Start Your Style Journey!
How to Hem Jeans by Hand Without Them Looking DIY
Even in a world full of sewing machines and quick tailoring services, hand hemming jeans still holds real value.
It’s simple, precise, and surprisingly durable when done right.
For many people, it’s also the fastest way to fix jean length without leaving the house or paying alteration fees.
Hand hemming shines in situations where machines fall short.
Preserving the original hem, working with thick or rigid denim, handling raw, cropped, or vintage finishes, or making a quick adjustment with no machine access—this is where hand sewing wins.
It gives you control. You decide the length, the stitch tension, and the final look.
What You’ll Need: Tools & Materials
You don’t need a full sewing kit or fancy gear.
A few reliable basics are enough to hem jeans by hand—and get results that last.
Heavy-duty hand sewing needle (denim needle)
- Denim is thick. A standard needle bends or snaps.
- Use a sharp, sturdy needle made for heavy fabric.
Thread (matching or contrast)
Go with polyester or upholstery thread for strength.
- Match the color for a clean, factory-style hem
- Use contrast thread if you want the stitch to stand out
Measuring tape or ruler
- Accuracy matters.
- Even a ¼-inch difference shows up when worn.
Tailor’s chalk or fabric marker
- Lets you mark length clearly without damaging denim.
- Avoid pens—they can bleed.
Sharp scissors
- Denim frays when cut poorly.
- Clean cuts = cleaner hems.
Pins or safety pins
- Hold the fold in place while sewing.
- Safety pins work well if denim is thick or stiff.
Iron & ironing board (optional, but strongly recommended)
- Pressing the hem flat before sewing makes stitches straighter and more consistent.
- It’s the difference between “DIY” and “done right.”
Best Stitch Types for Hand-Hemming Jeans
- Blind stitch → Nearly invisible; best for dressier or slim-fit jeans
- Backstitch → Strong and durable; ideal for everyday wear
- Slip stitch → Clean and hidden; great for preserving the original look
Step-by-Step Hand Hemming Process
Step 1: Try On & Mark the Desired Length
Put the jeans on with the shoes you’ll actually wear. This matters more than people think.
Fold the hem up until it hits the right spot, then pin or mark it with tailor’s chalk.
Why this step matters:
- Ankle-length jeans should hit just above the ankle bone
- Straight-leg or bootcut styles need a slight break at the shoe
- Cropped looks require precision—too short looks accidental
Take your time here. A bad mark leads to a bad hem.
Step 2: Measure Around the Leg
Take the jeans off and lay them flat on a table or floor. Using your original mark as a guide, measure and mark evenly around the entire leg opening.
Pro tip: Use a ruler to check both legs side by side. Even a small difference shows once you’re standing.
Step 3: Prepare the Fabric
Turn the jeans inside out. Fold the fabric up along the marked line.
If the denim allows it, double-fold the hem to hide the raw edge and prevent fraying.
Pin the fold securely all the way around. The tighter the hold, the cleaner the stitch.
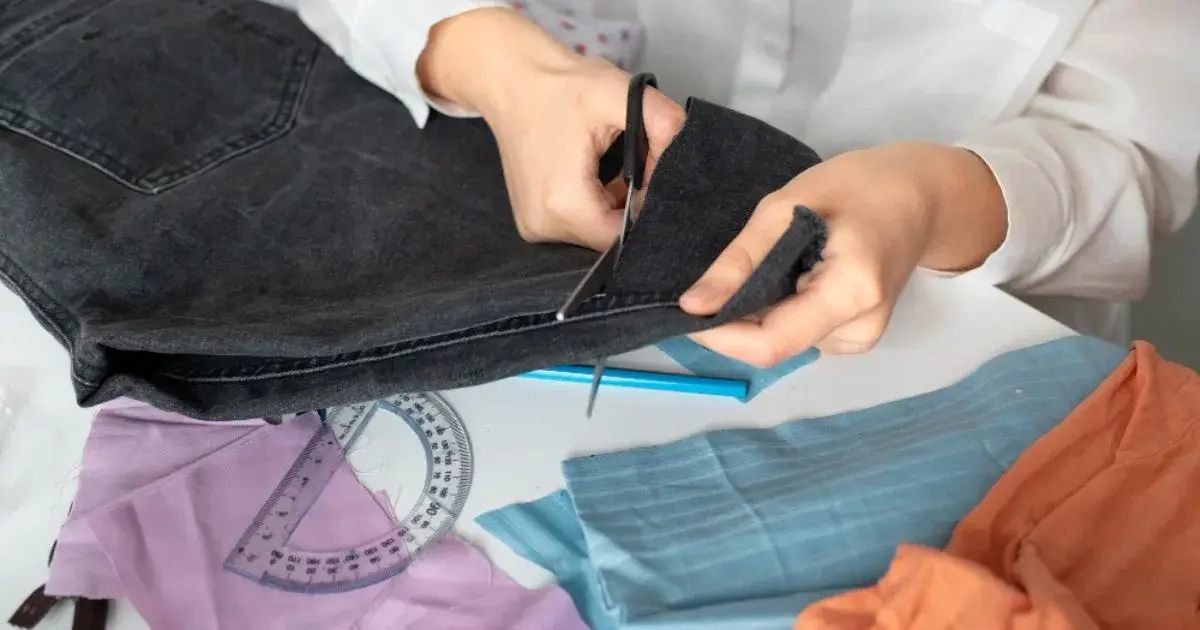
Step 4: Trim Excess (If Needed)
If there’s too much fabric inside the fold, trim it—but carefully.
Leave about 1–1.5 cm (½ inch) for a clean, stable hem.
Cut once, not twice. Denim doesn’t forgive mistakes. Use sharp scissors to reduce fraying.
Step 5: Sew by Hand
Thread your needle and knot the end. Start sewing from the inside seam so the knot stays hidden.
- Use small, even stitches
- Choose blind stitch for an invisible finish
- Choose backstitch for maximum durability
Keep your thread tension firm but relaxed. If the fabric puckers, the stitches are too tight.
Step 6: Final Press & Fit Check
Once sewn, turn the jeans right-side out and press the hem flat with an iron. This sets the stitches and sharpens the look.
Try the jeans on one last time. If the length feels right, you’re done.
If not, small adjustments now save big regrets later.
- Clean hem.
- Proper length.
- No machine required.
Best Hand Stitching Techniques for Jeans
Not all hand stitches work well on denim. Jeans are thick, heavy, and under constant stress—especially around the hem.
Choosing the right stitch makes the difference between a hem that lasts years and one that unravels after a few washes.
Blind Stitch — Clean & Nearly Invisible
The blind stitch grabs just a few threads from the outer fabric, keeping stitches hidden on the outside.
Best for:
- Slim-fit or straight-leg jeans
- Dressier denim or dark washes
- Anyone who wants a factory-clean finish
Pros:
- Almost invisible from the outside
- Polished, professional look
Cons:
- Less durable than other stitches
- Not ideal for heavy wear or stiff denim
Backstitch — Strong & Built to Last
This stitch overlaps itself, creating a tight, reinforced seam that holds up under pressure.
Best for:
- Everyday jeans
- Thick or rigid denim
- Workwear or high-movement use
Pros:
- Extremely durable
- Holds shape after repeated washes
Cons:
- Stitch line may be slightly visible
- Takes more time to sew
Slip (Ladder) Stitch — Hidden & Flexible
The slip stitch runs inside the fold, hiding the thread between layers of fabric.
Best for:
- Preserving the original hem look
- Lightweight to mid-weight denim
- Clean DIY alterations
Pros:
- Hidden stitches
- Allows fabric to move naturally
Cons:
- Requires steady hands
- Not as strong as backstitch
Which Stitch Should You Choose?
- Want invisibility? → Blind stitch
- Want durability? → Backstitch
- Want a hidden, flexible finish? → Slip stitch
When in doubt, backstitch for strength and blind stitch for appearance.
Common Mistakes & How to Avoid Them
Even careful DIYers mess up jean hems.
The good news? Most mistakes are easy to prevent once you know what to watch for.
Uneven Hems on Both Legs
This is the most common error—and the most noticeable.
Why it happens:
Marking one leg and assuming the other will match.
How to avoid it:
Always measure and mark both legs separately, then lay them flat and compare side by side before sewing. Use a ruler. Trust measurements, not eyeballing.
Stitches Pulled Too Tight
Over-tight stitches cause puckering and visible creases once the jeans are worn.
Why it happens:
Pulling the thread too hard to “lock” the stitch.
How to avoid it:
Keep even, relaxed tension. The thread should sit flat against the fabric, not dig into it. If the hem ripples, loosen your stitches.
Not Leaving Enough Seam Allowance
Cutting too close leaves no room for correction—and weakens the hem.
Why it happens:
Trying to remove excess fabric aggressively.
How to avoid it:
Leave at least 1–1.5 cm (about ½ inch) inside the fold. Extra fabric adds strength and gives you room to adjust later.
Frayed Edges
Fraying ruins clean hems and shortens the life of the jeans.
Why it happens:
Rough cuts or single-fold hems on thick denim.
How to avoid it:
- Use sharp scissors only
- Double-fold the hem whenever possible
- Press before sewing to lock fibers in place
A clean cut and proper fold prevent 90% of fraying issues.
Avoid these mistakes, and your hand-hemmed jeans will look intentional—not improvised.
Alternatives & Quick Fixes
Not every situation calls for a permanent hem. If you’re short on time—or just not ready to commit—these quick fixes can get the job done.
Temporary Hem Hacks
If you need a fast solution, no needle required:
Safety pins
Fold the hem inward and pin from the inside. It’s surprisingly secure for short-term wear, but not wash-safe.
Hem tape (non-iron)
Works well for light adjustments. Best for short outings or one-time events, not daily wear.
Use these when:
You’re traveling, testing a new length, or fixing jeans last-minute.
When to Use Iron–On Hemming Tape
Iron-on tape creates a semi-permanent bond using heat.
Good option if:
- You want a clean look without sewing
- The jeans are mid-weight denim
- You’re okay with limited durability
Know the trade-off:
It can stiffen the hem and may loosen after repeated washes. Heat also isn’t ideal for stretch or raw denim.
Think of hemming tape as a shortcut, not a forever fix.
Cuffing Jeans as a No-Sew Style Option
Sometimes the best fix is no fix at all.
Cuffing works especially well with:
- Straight-leg jeans
- Relaxed or vintage styles
- Casual, everyday outfits
Single cuff for a clean look. Double cuff for a more styled edge.
Just make sure both legs are rolled evenly.
- No tools
- No commitment
- Fully reversible
When in doubt, cuff first—hem later.
Style Tips: Lengths That Work Everywhere
Jean length isn’t just about comfort—it shapes how the entire outfit looks.
These length standards are widely accepted across casual, work, and everyday wear.
Skinny Jeans — Ankle Length
Skinny jeans look best when they hit right at or slightly above the ankle.
- Keeps the silhouette clean
- Shows footwear intentionally
- Avoids stacking or bunching
If the hem covers the ankle fully, the jeans usually look too long.
Straight-Leg Jeans — Classic Break at the Shoe
Straight-leg styles should fall naturally and just touch the top of the shoe, creating a subtle break.
- Balanced, timeless look
- Works with sneakers, boots, and loafers
- Ideal for everyday wear
Too short looks cropped. Too long loses structure.
Bootcut or Flared Jeans — Slight Grazing Look
These styles need length to flow properly.
- Hem should graze the top of the shoe or heel
- Avoid exposing the ankle
- Keeps the flare proportional and intentional
Cutting these too short ruins the line—measure carefully.
Always hem while wearing the shoes you’ll use most.
That single step prevents 90% of length mistakes.
Conclusion
Hand hemming jeans is one of those skills that looks intimidating—until you actually do it. It’s accessible, low-cost, and doesn’t require special equipment.
With basic tools and the right stitch, you can adjust length, control the fit, and keep your jeans looking intentional instead of improvised.
Like anything hands-on, it gets better with practice. Start simple. Try different stitches.
Pay attention to tension and spacing. The more you experiment, the more confident your results will feel—and the less you’ll rely on quick fixes or costly alterations.
Once you’ve done it once, you’ll realize this isn’t just a repair skill.
It’s a useful upgrade you’ll keep coming back to.